Last Updated on September 29, 2023 by Nyayik Vigyan

Color filters in forensic photography are often used to highlight specific features or details in an image. For example, color filters can be used to enhance the contrast between different colors or to make certain colors more visible.
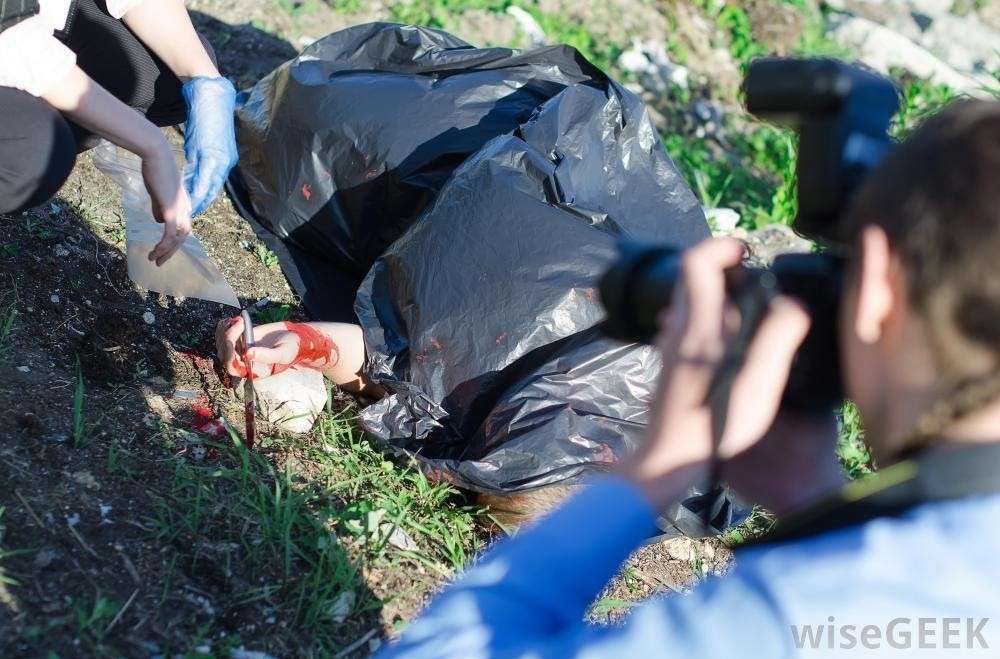
When to use color filters: Color filters in forensic photography are often used when it is necessary to highlight specific features or details in an image. For example, color filters may be used to enhance the visibility of bloodstains, bruises, fibers, or other small objects. Color filters may also be used to improve the contrast between different colors or to make certain colors more visible.
Types of color filters: There are several types of Color filters in forensic photography that are often used, each of which is designed to modify the colors in an image in a specific way. Some common types of color filters include red filters, blue filters, and yellow filters. Other types of color filters may also be used, depending on the specific needs of the forensic photographer and the nature of the objects or features being photographed.
- Red filters: Red filters are often used to enhance the visibility of bloodstains, as they can make red or pink colors more visible. Red filters may also be used to highlight other objects or features in an image that are red or pink in color.
- Blue filters: Blue filters are often used to enhance the visibility of bruises, as they can make blue or purple colors more visible. Blue filters may also be used to highlight other objects or features in an image that are blue or purple in color.
- Yellow filters: Yellow filters are often used to enhance the visibility of certain types of fibers or other small objects, as they can make yellow or green colors more visible. Yellow filters may also be used to highlight other objects or features in an image that are yellow or green in color.
Color filters are just one tool that forensic photographers may use to produce high-quality images that are useful for forensic purposes. Other techniques and equipment, such as lighting, camera settings, and specialized lenses, may also be used to capture detailed and accurate images for forensic analysis.
Using color filters effectively: To use color filters in forensic photography effectively, it is important to choose the appropriate filter for the specific colors or features that need to be highlighted. It is also important to consider the lighting conditions and other factors that may affect the appearance of colors in the image. In addition, it is important to use color filters in combination with other techniques and equipment, such as lighting, camera settings, and specialized lenses, to produce high-quality images that are useful for forensic analysis.
A filter is a transparent material that absorbs some colors and allows others to pass through. A color filter is a sheet of transparent material which modifies a light beam by absorption of some colors with respect to others. A neutral filter absorbs all wavelengths equally and merely serves to reduce the intensity of a beam of light without changing its color. Color filters are mainly used to enhance the quality of the particular object when captured. It only allows the particular frequency of light to pass on and radiate only such amount of light.
- Filters can be divided into three main categories:
- correction filters: for the correction of the wavelength of the light entering a lens
- protection filters: to protect the front lens
- effect filters: to give a special effect to an image.
The latent fingerprint was not visible clearly without the filter; hence we applied the filter and use modern technology to make the prints more focused which easily be detected by the investigator. Lately, we can see that the prints are more accurately seen with the black and white filter because it doesn’t give a particular idea or exact pattern of fingerprints. So, it is uneasy and a bit difficult to recognize the prints and study their pattern in the colorful photograph as evidence.
Technical Photography
The style of photography used at crime scenes to capture evidence is called technical photography. Crime scene photographers must take high-quality technical photographs to ensure the photographs can be used in the investigation and ultimately in court. Technical photographs are photographs that show as much detail or information about the view or object pictured as possible. The best technical photographs have four characteristics. They are exposed incorrectly way, have a maximum depth of field, and are in sharp focus.
While frequently there are conditions that make this difficult or impossible (the shallow depth of field can be seen always in close-range photographs), crime scene and evidence photographers must strive to take photographs with these characteristics.
Correct Exposure
Technical photographs must be correctly exposed. Correct exposures are necessary for the film to capture all the details in all parts of the scene, including highlights and shadows. Underexposed photographs lose detail in the shadows while overexposed photographs lose detail in the highlight areas. The correct exposure allows the professional to look after accurately and to capture the evidence with likely more perfection.
Mainly exposure is controlled by the lens aperture and the shutter speed. Likely most cameras are operated manually or else can be set in automatic modes. Automatic systems and automatic flash units produce adequate results in most normal situations. However, it is seen that automatic exposure may produce incorrect exposures.
Some common problem-lighting situations to be aware of include highly reflective scenes, bright sun-lighted scenes with deep shadows, and back-lighting.
Bracketing: Bracketing involves making a series of exposures of the same subject at different exposures, usually at one-stop or one-half-stop intervals. Some cameras can be set to automatically bracket at selected exposure differences from the metered exposure.
High Dynamic Range Photography: With bracketing, you may have two or more photographs to look at to see all the detail in the highlights and shadows in the view. A way to reduce two or more photographs to one photograph is to use (HDR) photography. High-dynamic-range photographs are generally achieved by capturing multiple bracketed photographs and then merging them into a single HDR image.
Flash Fill: One more valuable technique for ensuring accurate exposures, especially for scenes with deep shadows, is flash fill. In scenes illuminated by bright sunlight, there will usually be dark shadow areas. Sometimes evidence is located in the shadows. The detail in the deep shadow areas may be lost when the exposure is based on the overall brightness of the scene.
Maximum depth of field: Technical photographs must have a maximum depth of field. Depth of field, often called the plane of sharpness, is the area in a photograph where objects are in sharp focus. Crime scene and evidence photographs should have the maximum amount focused possible (a deep plane of sharpness). This is because out-of-focus areas of a photograph can become issues in court. An opposing attorney could suggest that you purposely caused an area to be out of focus in a photograph to obscure some additional evidence that would be clearly visible if properly photographed.
Sharp Focus: Technical photographs must be in sharp focus. To make sure that your photographs are in sharp focus, keep the camera steady during the exposure. One should mount the camera on a tripod if the shutter speed is less than 1/60 second and focus carefully. Also, maximizing the depth of the field will result in sharpness in a larger area of the photograph.
Flash Illumination
Types of flash illumination:
Manual Flash: When you use a manual flash set the lens f-stop for the flash-to-subject distance (the f-stop for each distance is usually displayed in a chart on the back of the electronic flash).
Automatic Flash: Automatic flash units use distance ranges. Each range has a minimum and maximum distance. An f-stop is assigned to each range. Changing to a new range requires a change in f-stop. When in an automatic flash, make sure the camera shutter speed dial is set to the flash synchronization speed. When photographing a high-key scene (light or reflective background) bracket exposures by opening up one or two f-stops.
Dedicated Flash: The basic dedicated flash unit sets the correct flash synchronization speed when the flash is in operation. It uses an automatic sensor and distance ranges. You must set the appropriate f-stop for the distance range. More advanced dedicated flash units may set both the correct flash synchronization speed and f-stop for the automatic range selected. Dedicated TTL flash — The dedicated TTL (through-the-lens) flash uses a sensor inside the camera to control the duration of the flash. Use smaller lens apertures for short distances and larger lens apertures for long distances.
A confidence light or a warning light will indicate whether a useable f-stop was selected. If the equipment indicates there was not enough light, select a larger lens aperture and re-photograph. Dedicated TTL flash units can usually be used in manual and automatic modes, as well as TTL.
Bounce Flash: The bounce lighting is used for less contrast, softer lighting, reducing the intensity of the light, or increasing the angle of flash coverage. Bounce lighting is accomplished by angling the flash to reflect the flash of a white- or light-colored surface, usually a ceiling. With manual flash, add the space up and down for the flash-to-subject distance and then add in the absorbance loss (one to three f-stops). For bounce lighting utilizing an automatic flash with the flash sensor facing the subject, use a range for two or more times the actual flash-to-subject distance.
Multiple Flashes: To illuminate large areas you can get good results by using several flash units positioned around the scene. The flash units can be triggered simultaneously by connecting them with sync cords or using photocell devices that remotely trigger the flash units when the camera-mounted flash fires. To balance the intensity of each of the flash units, the distance of the flash units from the subject is to provide the same f-stop value for each flash.
Available Light Photography
Available light photography is particularly useful for big crime scenes at night when a single flash will not provide adequate coverage. Lighting for the photograph may be from street lamps, parking lot lamps, or even moonlight. Available light from street lamps is frequently used at night traffic collision scenes to provide lighting for large areas. You may be able to get an adequate exposure meter reading to operate your camera in manual settings. Automatic cameras may also operate in low-light conditions. Many supplementary exposure meters provide accurate readings in very low-light conditions.
References
- West’s Encyclopaedia of American Law (2nd edition, The Gale Gp, 2008).
- Bynon, Theodora, Historical linguistics,62(1977).
- Webster’s 1913
- “Canicid”, http:/en.wiktionary.org.
- Chicago Daily Tribune. June 11,1912, page 1
- Villiscaiowa.com
- http://www.mumbaimirror.com/
- http://articles.times of india.indiatimes.com